
Helpful Tips for Replacing a Roof Vent

Did you know that the roof ventilation system is one of the most important aspects of your home? Without proper attic ventilation, you can end up with moisture buildup and mold.
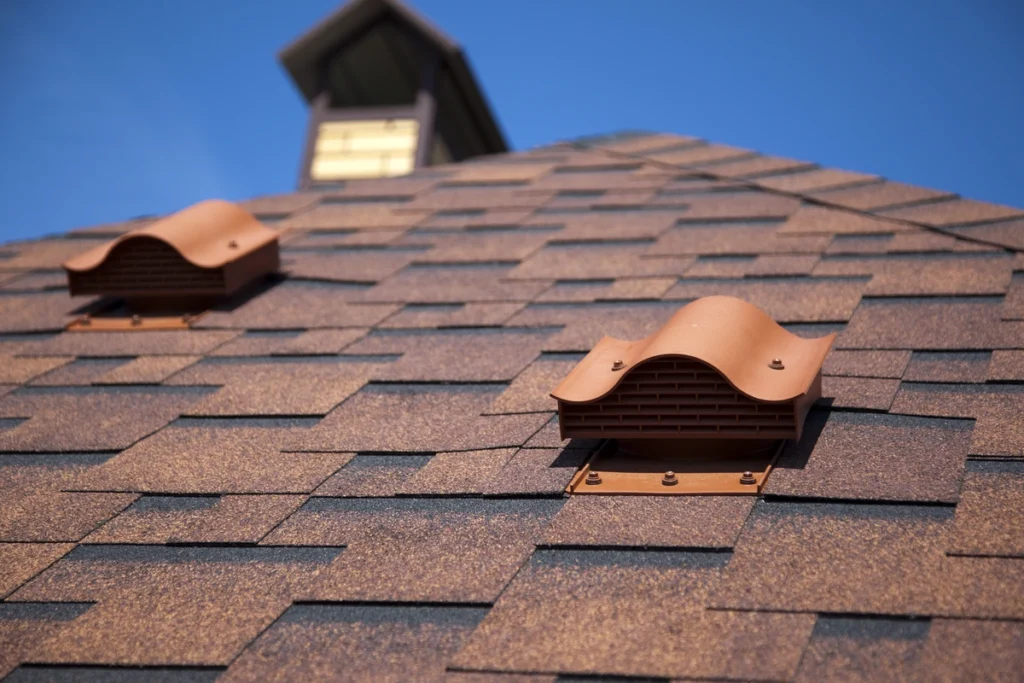
When it comes to maintaining a healthy and functional roof, replacing a roof vent is an important task that shouldn’t be overlooked. Roof vents play a crucial role in ensuring proper attic ventilation, and preserving the integrity of your home.
However, over time, roof vents can become damaged, worn out, or outdated, necessitating their replacement.
Are you looking for a guide to help you with your roof vent installment? Keep reading!
Preparing for the Replacement

Start by assessing the condition of your roof vent and the roof ventilation. Keep an eye out for any signs of damage or deterioration. Are there cracks, rust, or loose parts?
Identifying these issues will help you understand the extent of the problem. Don’t forget to evaluate the age and material of the existing vent. This will give you an idea of whether a replacement is necessary or if a repair will suffice.
Now that you have a good grasp of the condition of your roof vent, it’s time to gather the necessary tools and materials. Make a checklist of all the tools you’ll need for the replacement. You’ll likely need:
- Screwdriver
- Pliers
- Utility knife
- Pry bar
- Drill
Think about the type of replacement vent you’ll need. Consider the size, style, and material that best suits your roof and ventilation requirements. With the right tools and the perfect replacement vent in hand, you’ll be well-prepared for a smooth replacement process.
Of course, safety should always be a top priority when working on your roof. While some DIY enthusiasts may tackle the replacement themselves, it’s important to ensure you’re taking the necessary safety measures.
Consider working with a partner or seeking professional assistance, especially if you’re not comfortable with heights or lack experience with roof work. Don’t forget to gear up with personal protective equipment (PPE) as well. This may include a:
- Hard hat
- Safety goggles
- Gloves
- Sturdy footwear
Removing the Old Roof Vent
Before you start, make sure you clear the area surrounding the vent. Remove any debris, leaves, or other obstructions that might get in your way. You want a clean and accessible workspace to make the removal process easier.
If your roof vent is connected to electrical wires or plumbing pipes, it’s crucial to shut off the power or water supply before attempting any disconnections. Follow the appropriate procedures for disconnecting these connections, and if you’re unsure, it’s best to consult a professional to avoid any mishaps.
Once the electrical and plumbing connections are taken care of, it’s time to remove the fasteners and attachments holding the old vent in place. Grab your tools and carefully loosen and remove the screws, bolts, or other fasteners securing the vent. Be patient and gentle to avoid damaging the surrounding roof structure.
Depending on the type of vent, it may be attached with:
- Adhesive
- Caulk
- Additional fasteners
- Screws
- Nuts and bolts
- Nails
Carefully pry or lift the old vent away from the roof surface, using a pry bar if necessary. Take your time and be mindful of any resistance or sticking points. With a little finesse, that old vent will be on its way out!
With the old vent removed, take a moment to inspect the roof for any damage or wear. Check for any:
- Signs of leaks
- Missing shingles
- Weakened areas
If you notice any issues, it’s important to address them before installing the new vent. Repair any damage and ensure that the roof surface is in good condition and ready for installation. It’s better to fix any problems now than to have to deal with them later.
Installing the New Roof Vent
The first step is to position the new vent correctly. Take into account the size and style of the vent, and align it with the existing opening or mark a new spot if needed.
Make sure it’s centered and properly placed on the roof surface. Take a step back and double-check to ensure it looks just right.
Now, it’s time for some fine-tuning. Making necessary adjustments for alignment is key to a snug fit. Use a level to ensure the vent is perfectly horizontal or sloped, depending on the design.
If needed, make slight adjustments to the position to achieve the desired alignment. A little tweaking here and there will go a long way in making your roof look polished and professional.
Once the new vent is perfectly positioned, it’s time to secure it to the roof. Refer to the manufacturer’s instructions for the specific installation method. This may involve using:
- Screws
- Nails
- Adhesive
Follow the recommended guidelines and fasten the vent securely to the roof, ensuring it is firmly in place. You don’t want any wobbling or movement during strong winds or heavy rain.
If your new roof vent is equipped with electrical or plumbing components, it’s time to make the necessary connections. Carefully attach the wires or pipes according to the manufacturer’s instructions or seek professional assistance if you’re not confident in your skills. Double-check the connections and ensure they are secure and properly insulated to prevent any potential issues down the line.
Apply a high-quality roofing sealant or flashing around the edges of the vent, making sure to create a tight seal between the vent and the roof surface. This will prevent water from seeping in and causing damage. Take your time with this step to ensure a thorough and effective seal.
Now that the vent is installed, it’s time to give it a final once-over. Verify the vent’s stability and integrity by giving it a gentle shake or tug. Ensure that it feels solid and doesn’t move or come loose.
Take a quick look around the vent to ensure all components are in place and securely attached. This final check will give you peace of mind knowing that your new roof vent is ready to do its job efficiently.
Replacing a Roof Vent: Looking for Help?
Replacing a roof vent might seem like a daunting task, but armed with the right knowledge and guidance, it becomes an achievable project that can have a significant impact on the functionality and longevity of your roof.
Remember to prioritize safety throughout the entire process, and if needed, don’t hesitate to seek professional assistance.
Are you looking for help with roofing repair and proper roof ventilation? Get a free inspection today!
Check out our recent articles


Solving problems. Building relationships. Pursuing a righteous outcome.
